
An asset can be any valuable item to be classified and kept in a location. To add assets on MARSS web, navigate to the Add option from the Asset menu.
Before adding an asset ensure you’ve setup your
- Categories (https://www.onmarss.co.za/?knowledgebase=1-3-setup-categories) and
- Locations (https://www.onmarss.co.za/?knowledgebase=1-2-setup-locations).
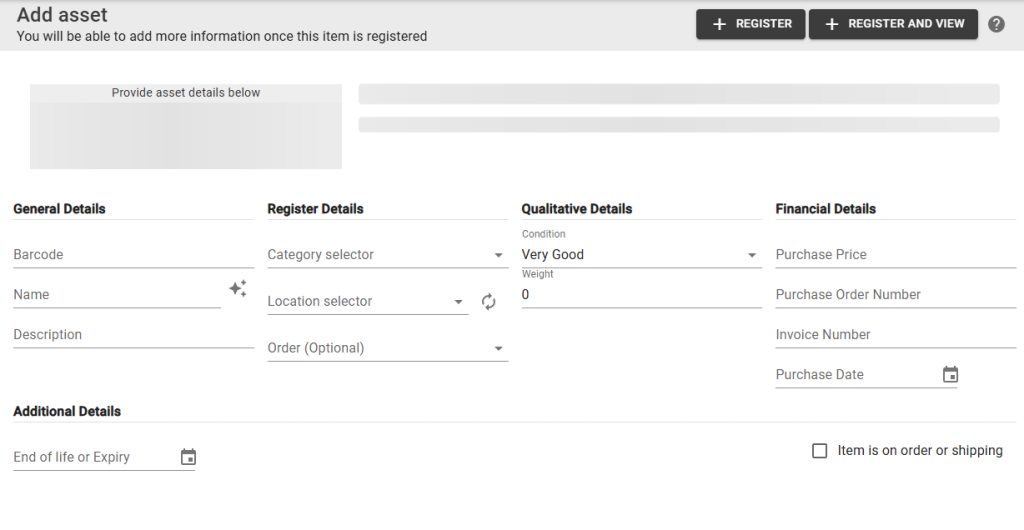
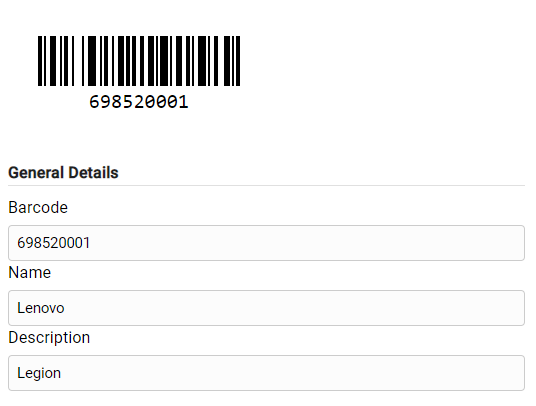
Step 1: Enter a unique barcode for the asset, a name and a description in the general details section:
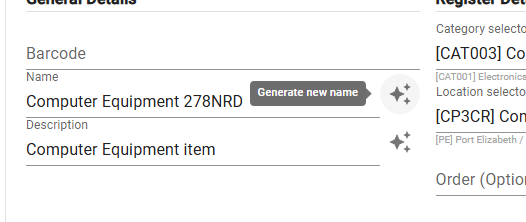
Note: To autofill the name and description fields with the category and location, search and select the category and location first or select the icon in the Name field to autogenerate:
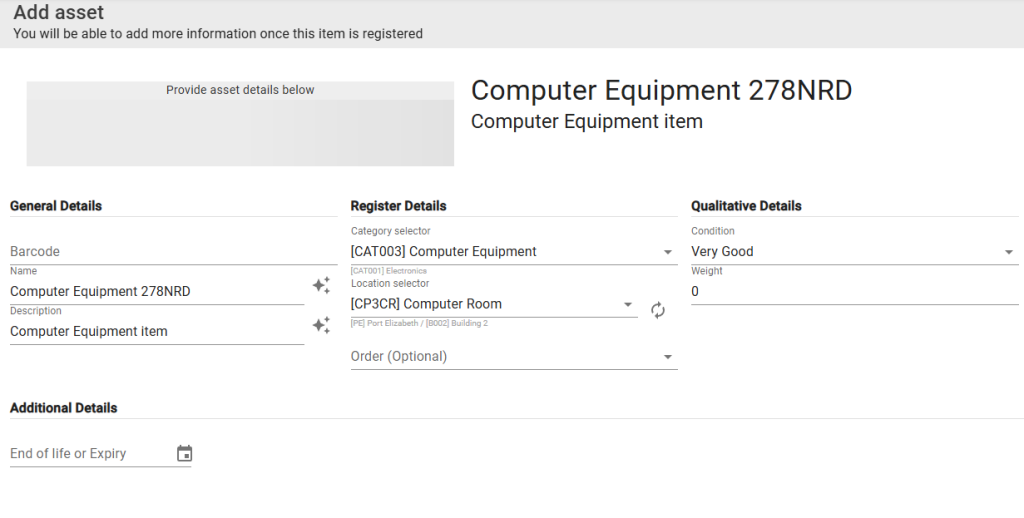
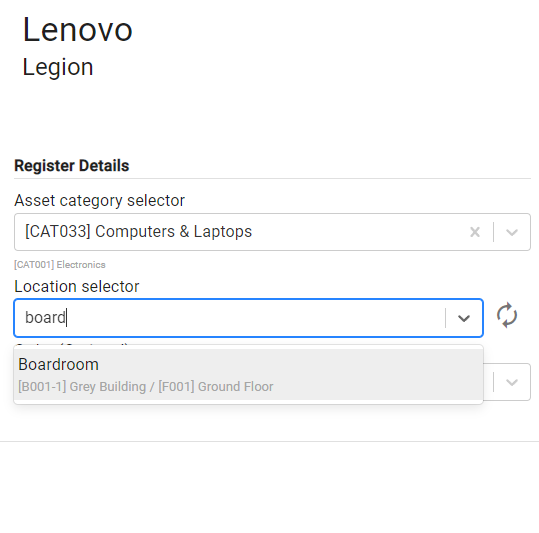
Step 2: Enter the name to search and select the Category (classification of the asset) and the Location (where the asset is situated, or a root or external location if the asset is on order):
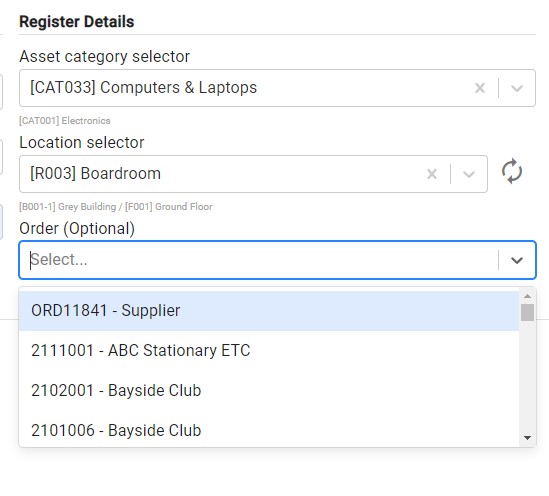
Step 3: Optional – If the asset is related to an outstanding order, search and select the order number:
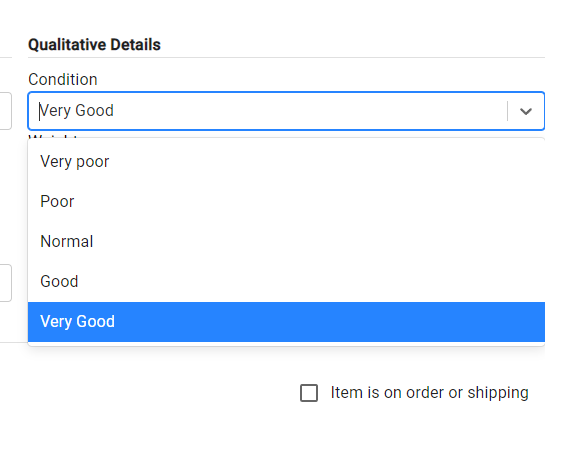
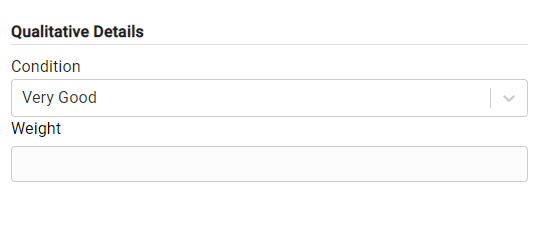
Step 4: Select the asset condition from the drop-down list in the qualitative details section:
Step 5: Enter the weight of the asset:
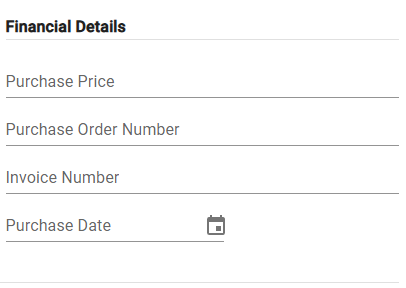
Step 6: Complete the financial details of the asset:
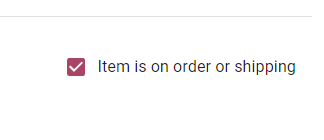
Step 7: Optional – Select the check box if the asset is currently on order or shipping (if applicable). The order status of the asset will automatically update once the asset is checked in.
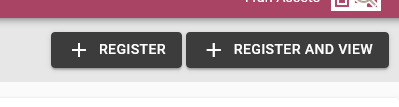
Step 8: From the top right corner, select the Register button to register the asset and remain on the add asset page. Select the Register and view button to navigate to the asset details page once it is registered:
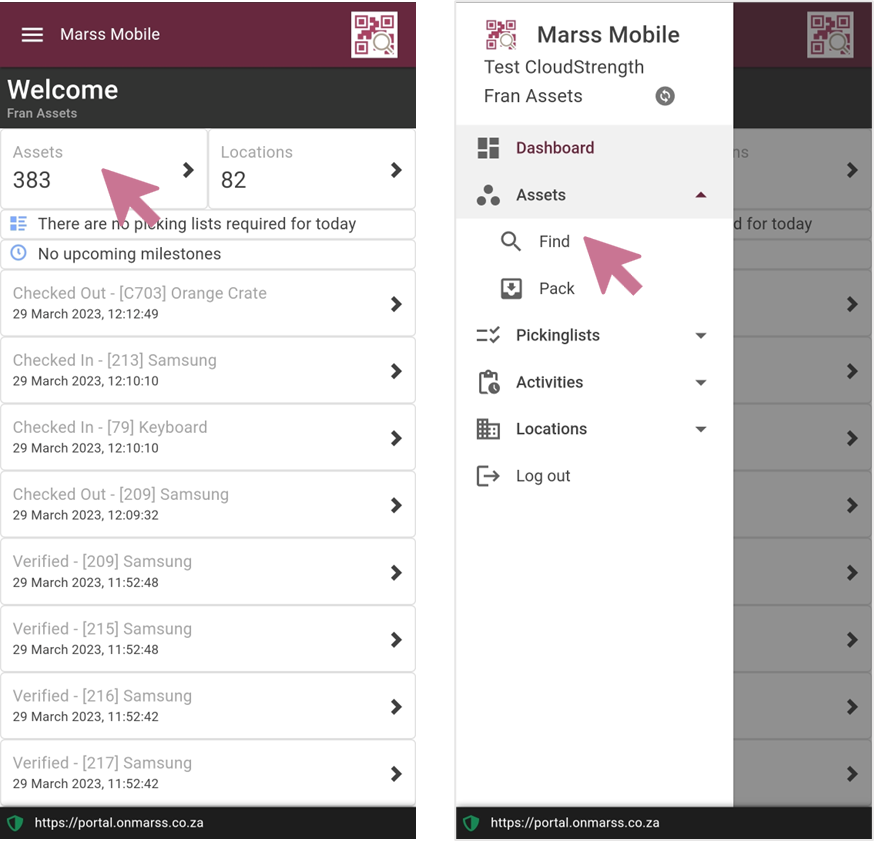
Marss Mobile
To add assets on MARSS mobile, navigate to the Assets page on a mobile device:
Step 1: Select Assets on the dashboard or select Find under Assets from the menu:
Step 2: Scan or enter the barcode number in the scan barcode field, if entered select the Find button:
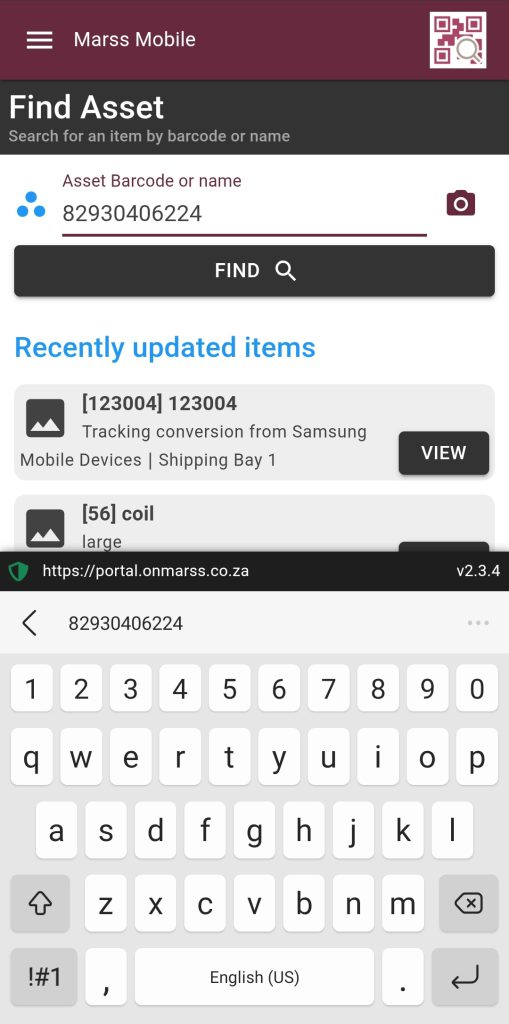
If the camera icon is selected, scan the barcode with your device camera. If you are using a scanning device, simply scan the asset barcode into the barcode field.
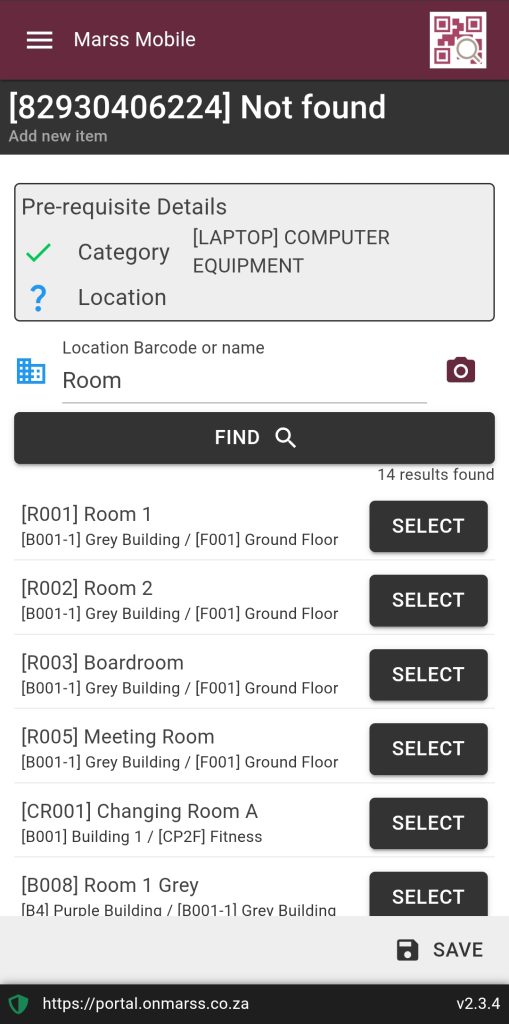
Step 3: Scan or enter the category barcode OR search for the category by name by entering the name and selecting the Find button. Perform the same step for the Location:
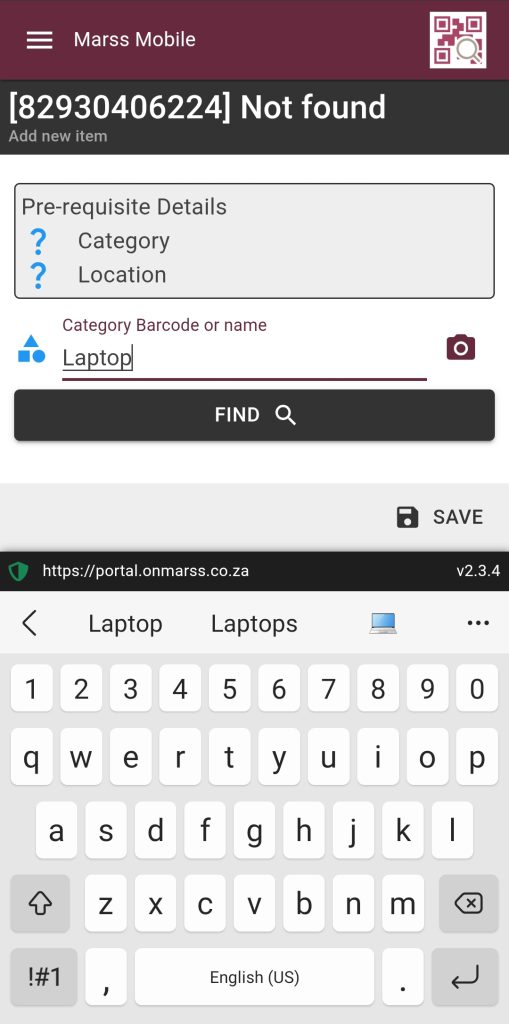
Once the category and location is selected, autofill buttons next to the name and description fields can be used to auto generate a name and description for the asset, the autofill can be updated or type a name and description:
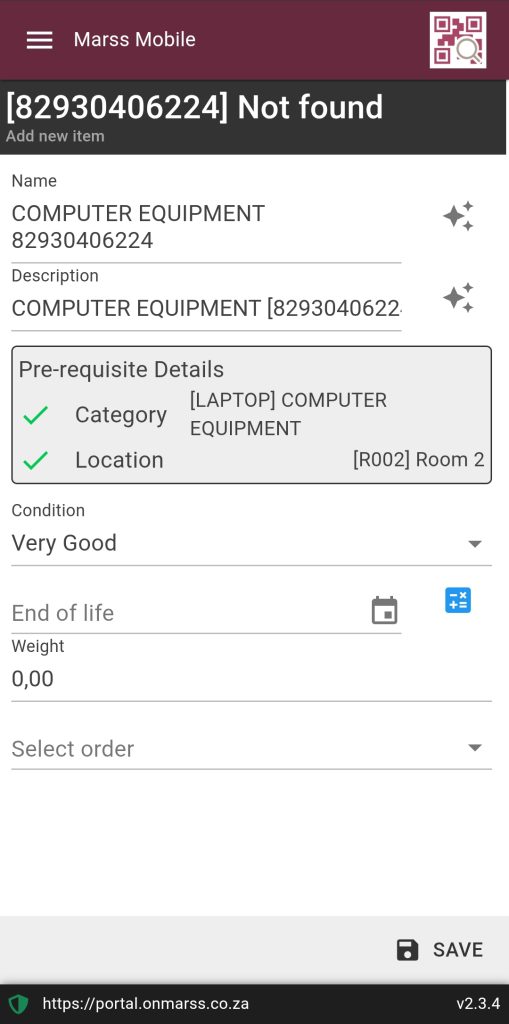
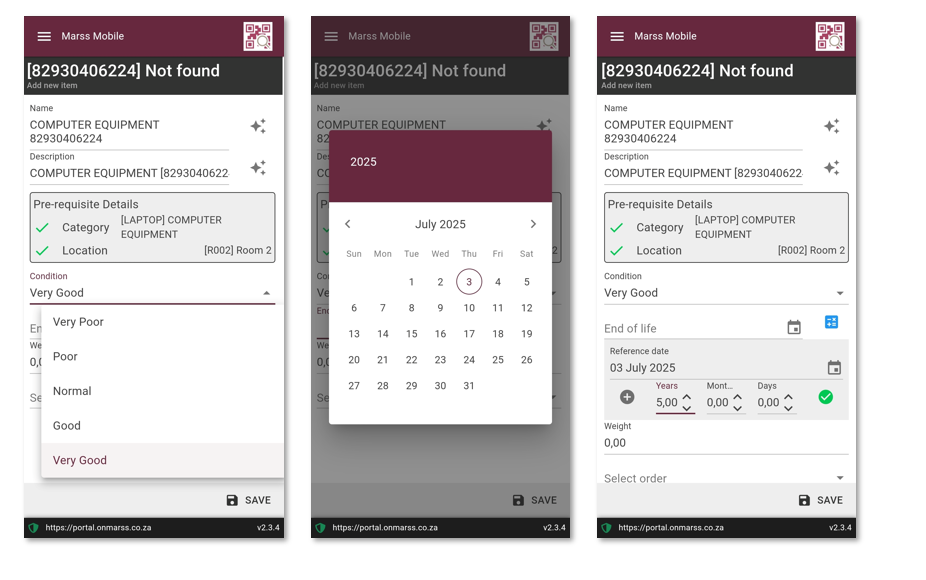
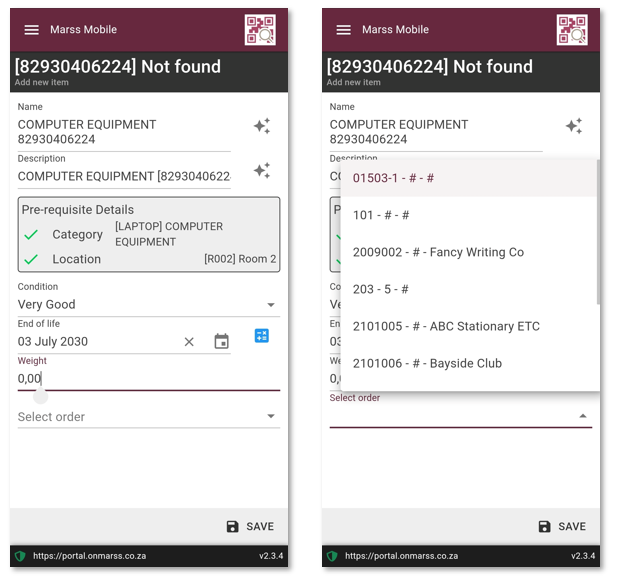
Step 3: Complete the rest of the fields:
- Select Condition: Very Poor, Poor, Normal, Good or Very Good
- End of Life: Select the date picker to select the end of life date OR select the calculator icon to expand the field to select a date by entering years/months/days, the date will then automatically calculate based on today’s date
- Weight: Enter a weight for the asset, this is optional
- Order: If the asset was on order, search and select the order number from the list
Step 4: Select the save icon button at the bottom, once the asset is successfully added, the asset details view will be displayed: